Setting up a Normal (Physical) Product
IMPORTANT NOTE: Save page often by clicking Save button at bottom of left column
CREATE A NEW PRODUCT
1. Select Products Listing under the Products dropdown in top bar
2. Click Add Product button in top right of screen
LEFT COLUMN
1. Choose Product (Normal product is a physical project that requires shipping) (required)
2. Enter a Product Name (required)
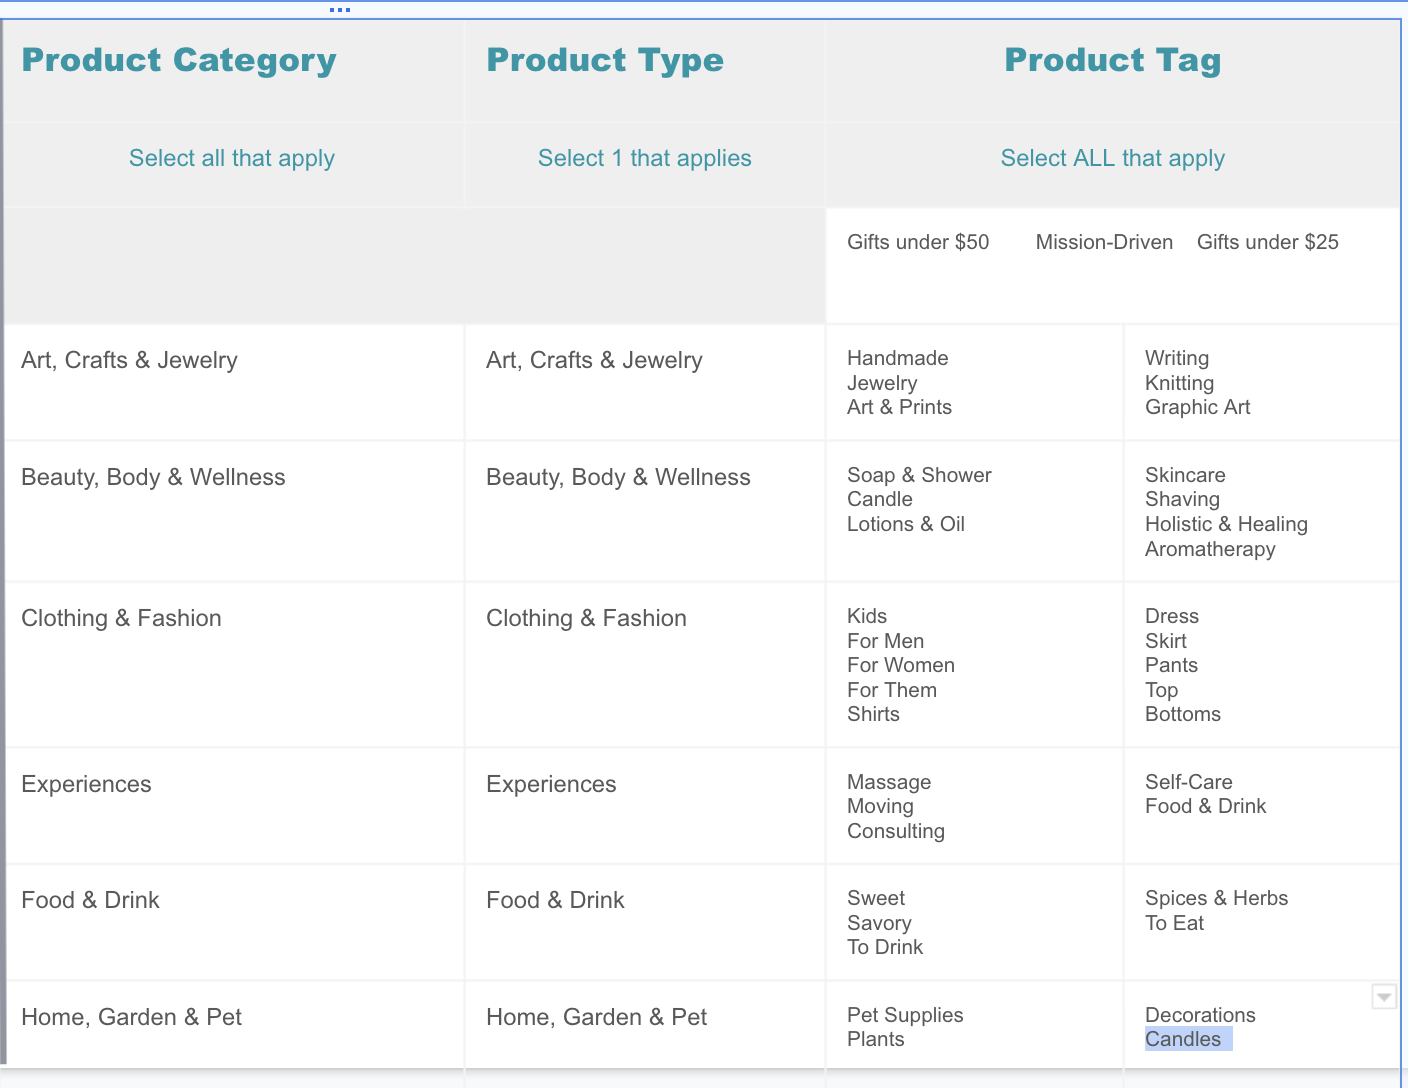
3. Enter Product Type: You can choose only 1 Product Type. Pick only the one that most describes your product selection. See the image at bottom of this page for a list of Product Types. (required)
4. Add a description of the product (optional but highly recommended)
5. Enter Product Tags: You can choose multiple Product Tags. Click on the field and find the Product Tags that best fit your product. Only choose tags that are relevant to your product. See the image at bottom of this page for a list of Product Tags. (required)
5. Shipping details (required)
- Enter product weight (in Pounds only) IMPORTANT: Enter 0 if you choose Free Shipping. (required)
- Click Requires Shipping if not already checked (required)
- Select Shipping Method (We HIGHLY recommend selecting Free Shipping. If you select Marketplace shipping, you'll have to set up shipping rates in Configuration dropdown.) (required)
6. Pricing details
- Enter Price (required)
- Enter Compare at Price if you'd like to show a sale in the store (e.g. enter $50 in Price field and $75 in Compare at Price field) (Optional)
- Check Charge Taxes on This Product (Optional)
7. Inventory Details
- Enter SKU(Optional)
- Enter Barcode (Optional)
- Select Track Inventory
- Add Quantity available for sale (Required)
8. Variant Details
- Click Add Variant if you'd like to allow customers to choose various sizes, styles and colors of the product (Find details on setting up variants.)
RIGHT COLUMN
1. Product Image
- Click Upload Image
- You can choose up to 10 images
- Use jpg or png images
2. Select Category
- You can select multiple categories, but choose ONLY those relevant to your product. See the image below for a list of Product Categories. (required)
----------------------
EXAMPLES OF SETTING UP ACCOUNT, STOREFRONT AND SPECIFIC PRODUCT OPTIONS
1. Setting up your Account & Storefront
2. Setting up Normal (Physical) Product
3. Setting up Digital Product
4. Setting up Product Type, Tags and Collections
5. Setting up Product Variants
6. Setting up Free Shipping
7. Setting up Shipping Costs (Note: We recommend setting up Free Shipping instead of adding shipping costs)