Setting up Your Account and Storefront
SET UP PROFILE
1. Go to the Holiday Market vendor section: https://northwest-made-holiday-market.sp-seller.webkul.com/index.php?p=login
2. Create a user name and password.
3. Go to the Profile dropdown at the top page. Click on My Account
LEFT COLUMN
2. Contact info: Fill in your contact info in the left column fields (IMPORTANT: In the Seller Shop Name field, enter the name of your business and not your personal name.)
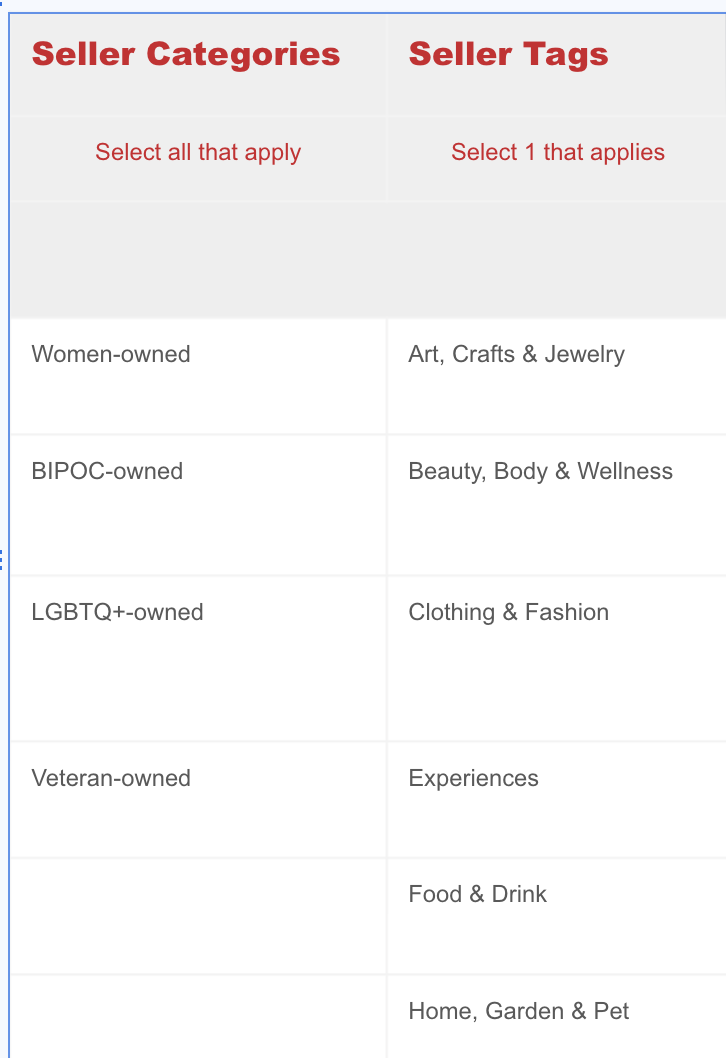
3. Seller tags: Under your contact info, select 1 Seller Tag. Click on the field and choose 1 tag from the list that appears. (See image at bottom of this page for a list of available tags).
4. Fill in descriptions/policy:
- Short description: Add a short description of your store (a sentence or two). IMPORTANT: Include your contact info (email and/or phone) in the short description.
- Long description that will offer description of your products/services on your store page
- Policies you have for sales, shipping, returns, etc.
5. Add Banner. Save your changes and then upload a banner image for your store below the Save button. (Note: Dimensions for the banner are 900x225 px) Save your page again. Optional: Download Official Event Banner Here.
RIGHT COLUMN
1. Upload seller profile image (suggested dimensions: 185x185 px)
2. Upload seller shop logo (suggested dimensions: 165x165 px)
3. Select seller category: Select all that apply. (See categories in the image at bottom of this page)
4. Save page (button in left column)
5. To preview your storefront, Click View Profile button in top right.
Once you add products, your Storefront will show all your products.
IMPORTANT: After you set up your profile, check your email for a confirmation message that your account has been approved. You will get this email within 24 hours of setting up your profile. Click the link in the message to sign in. This will validate your account.
SET UP PAYMENT
In order to receive payments, you need to set up a Stripe account. Follow these steps to register and integrate Stripe:
1. In your Shopify account, Go to the Orders dropdown at top of page
2. Click on Stripe Connect Config--you'll be taken to a page that will prompt you to set up a Stripe account.
3. Create a Stripe account and then follow the prompts to complete your account setup
4. Return to Stripe Connect Config (In Orders dropdown) in Shopify and make sure it says "You have successfully added your account to Stripe"
SET UP INVOICE
1. Go to Configuration dropdown at top of page
2. Select Invoice configuration and fill in fields. The invoice will be sent to customers after they complete a purchase.
3. Click Save
----------------------
EXAMPLES OF SETTING UP ACCOUNT, STOREFRONT AND SPECIFIC PRODUCT OPTIONS
1. Setting up your Account & Storefront
2. Setting up Normal (Physical) Product
3. Setting up Digital Product
4. Setting up Product Type, Tags and Collections
5. Setting up Product Variants
6. Setting up Free Shipping
7. Setting up Shipping Costs (Note: We recommend setting up Free Shipping instead of adding shipping costs)